Setting up a TF2 Server with Custom Maps using Linux Game Server
Setting up a TF2 Server with Custom Maps using Linux Game Server
I was recently trying to play some custom maps with some friends on Team Fortress 2 but with some custom maps. There are tons of community servers that run certain maps on rotation but these are not always the ones you want to play, especially if you want to play the older maps. I had a bit of trouble setting the server up since there is very little up to date documentation on how to get it running with custom maps specifically so I figured I would try and fill the gap for those who stumble across this in the future.
I’ll leave the guide here and commentary to the end, in case you are interested in ramblings. This is for Linux, whether on a personal Linux host or on your cloud provider. Some of the lessons here can definitely be used on a Windows machine, such as the files you need to place and where but the commands, scripts, etc are very Linux centric and not portable. You may have luck with the Linux Subsystem for Windows 10, but I have not tried it.
Step 1: Getting the Linux Game Server, aka a stock install
This much is pretty simple, you can follow the directions on their site and that’s all you have to do for setup. For completion sakes and because link rot is sometimes a thing, I will include the exact directions here:
adduser tf2server
passwd tf2server
su - tf2server
wget -N --no-check-certificate https://gameservermanagers.com/dl/linuxgsm.sh && chmod +x linuxgsm.sh && bash linuxgsm.sh tf2server
./tf2server install
This should get you a working install, after working through that stuff. There are a few other things you may want to change, you can read the rest of the page there to find out more. The download is fairly big and can take a bit, so you can can read on and be prepared for when it’s done. You can even complete Step 2 while this is going in the background.
Step 2: Expose it to the Internet
Home Connections
This will sound pretty obvious if you’ve ever ran a game server but I will mention it for completion sakes. You will need to open the port that inbound connections will be coming on if you sit in a typical residential network with a gateway in front of your server.
You can refer to you routers manual for specifics but you need to setup Port Forwarding for the inbound port, 27015 and there is no sense in going over a tutorial on this here, since there are tons of guide on the web.
Cloud Providers, Digital Ocean
If you are using Digital Ocean or some other cloud provider, the port is probably already available if you have a dedicated IP for yourself. You may need to allow the port as well, depending on the distro you chose to run. If you are running something running ufw then you can use something like: sudo ufw allow 27015 to open inbound traffic on that port for yourself. Otherwise, open the port on the firewall however you choose.
You can read more about ufw on the DigitalOcean site or elsewhere on the web, if you need to deal with it.
Checking connectivity…
There are tools you can use such as CanYouSeeMe for local installs to check a port. Linux Game Server has something built in for this, so there’s no need though. Just run ./tf2server monitor and you can check your status. If it says OK then you should be good to go.
Step 3: Load up custom maps into the directories needed
You can find a ton all over the web, these are just a few places:
- GameBanana
- Wiki
- TF2Maps
- … or any other BSP files you can find on the web that is supported
You can find a ton of them in various indexes available on the web as well, such as here. Once you have a few, you can follow the below directions.
-
You can begin by entering your directory of your server as the user you created when using the TF2Server installer. If you run
cd serverfiles/tf/maps/you will end up in a directory full ofbspfiles. In here, you can place all the files you downloaded and want to play. There are a couple ways to do this….- If it’s local, you can just use a File Explorer, of course.
- If it’s remote, you can look at something like
scp,ftp, mount your file system as SSH or whatever you prefer. You can use Google to find this information…
-
Then, you can
cd -to go back to the root directory, where you were and your./tf2serverscript should reside. You need to add the maps that you have to your config now, so you can this by executing a bash one liner. This was the part that confused me the most, since a lot of places on the web talk aboutmaplistandmapcycleand to edit it to include the new maps you want to play. If you are like me, you would not have had these files at this point and would be unable to find them usingfind . -name "*maplist*"and it would turn out that it does not. You need to create it. To do this…ls serverfiles/tf/maps/ -a | sort | sed -e "s/\.bsp//g" > ./serverfiles/tf/cfg/maplist.cfg ls serverfiles/tf/maps/ -a | sort | sed -e "s/\.bsp//g" > ./serverfiles/tf/cfg/maplist.txt ls serverfiles/tf/maps/ -a | sort | sed -e "s/\.bsp//g" > ./serverfiles/tf/maplist.txtTo be honest, I am not sure you need to duplication but I have not gotten around to testing it yet. However, this should be at least a working install. You can throw this in a script and call it, say
updateMaps.shif you want so that you can re-run it every time you add new maps. -
For some maps, there are some additional settings to set as well to set. You can find those below, make sure to read them if you need them.
-
Restart your server. You can do this using the Linux Game Server script, by running
./tf2server restartand then waiting a few minutes for the server to come back up.
There’s also some additional configuration to do depending on the map you play. For example, some maps have bots that occupy slots and need a large number of slots for them, such as Mann vs. Machine and perhaps other modes. Some maps are just big. In our case, we needed to do this:
nano lgsm/config-lgsm/tf2server/tf2server.cfg
… and then add these lines
maxplayers="32"
net_maxfilesize="64"
This will let you play most maps without trouble. You will need to restart your server after any of these changes.
Some places on the web will let you know you need to also configure a FastDL server, this is false at the time of writing this in 2018. You only need this if you want to serve files that are large at a quick download time. If you are just setting up a local server to play with some friends and have custom maps rotate out, this is overkill and your friends can wait the 5 minutes it needs to download a map, once.
Step 4: Connect and then load the map
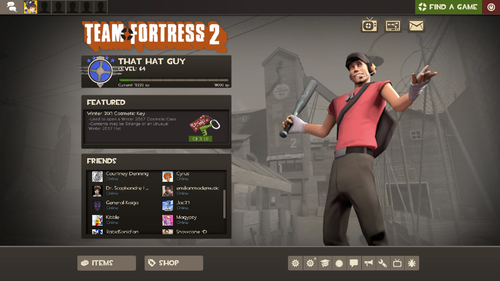
In Team Fortress 2, you can then click “Find Game”:
.. and then click “Community Servers”. Then, you can click the “Favourites” tab and then “Add Server” button in the bottom right. You can then add the IP of the server. You can find the public IP pretty easily by requesting it from the outside world by asking Google or if you know there’s no gateway in front you can just do ip addr to figure it out.
If all went well, you should be dumped into whatever the default map is when you connect. If not, time to troubleshoot.
To change maps, the easiest way is through rcon and you can find most of this through the Linux Game Server documentation. The gist is, run ./tf2server console and then you will be dropped in a console. Then…
- You can run
maps*to get a listing of all the installed maps. Yours should be listed now, without thebspsuffix since that’s the convention. - You can run
changelevelto change the map that is currently being played, using the name of the map from the above command or just use the filename of the map without the extension (.bsp)
There are other rcon commands and there are various guides on the web with interacting with it. I reference this http://ozfortress.com/showthread.php?p=415211 but there are probably other guides out there that are better / more detailed.
Ramblings
I found it pretty frustrating that most of the information on the web was pretty incomplete in terms of what to do to get a fully working install with nothing. Google gives a lot of guides on Windows which are incomplete and talk about files that are not even there and does a good job of misleading you through what you need as a minimum. For example, the first Steam Link there insists you setup a web server and FastDL and spends most of the post on that. There are other interesting problems aside from FastDL. I kind of wish there was a better way and I am kind of surprised that the folks at Linux Game Server don’t have a way to do this since they have a mod installer but not a map installer.
It took a pretty large amount of time to get everything right and it could have been a lot easier with a proper write up and instructions that detailed the custom map portion. So, I leave this in hopes it will help someone else.
Happy playing! If there are questions, you can drop them below.